- Start by starting the “Drive” app for your iPhone or iPad. Use Apple’s built-in Spotlight Search if you can’t locate it on your private home display screen.
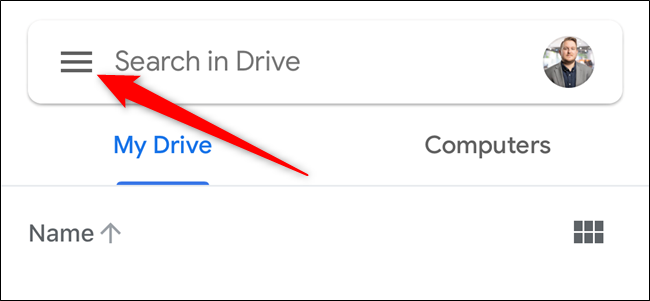
- Next, faucet on the three-line hamburger menu icon.
From the slide-over menu that appears, pick the “Settings” option. - Tap on the “Privacy Screen” button found within the center of the screen.
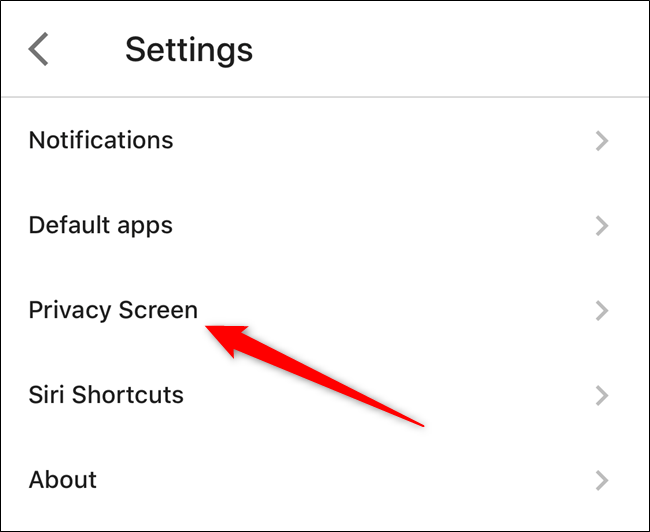
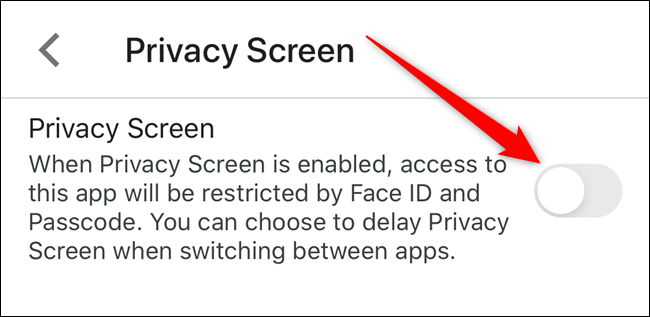
- You can now read greater approximately the Privacy Screen function. If it’s something that you’d want to enable, toggle on the “Privacy Screen” option.
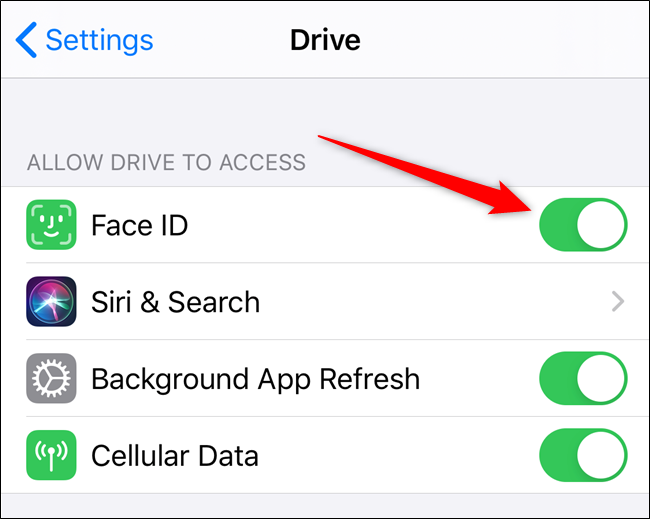
- Your iPhone or iPad will show a pop-up asking for you to provide the Google Drive app permission to get entry to Face ID or Touch ID on your device. Tap on the “OK” button to permit it.
- Give Google Drive permission to get admission to Face ID or Touch ID
- The next time you go out and reopen the Google Drive app, you may see a display similar to the only below. Authenticate the usage of your face or your fingerprint to access the cloud storage application.
- Google Drive will now use Face ID or Touch ID to authenticate
- Now that the Privacy Screen putting is enabled, you will see numerous new alternatives to customise the feature further.
- By default, the Privacy Screen feature locks the Drive app the moment you lock your iPhone’s or iPad’s display or go away the app. If you need to feature a time put off, tap on the choice that corresponds to the “Delay” listing.

- Tap on the “Delay” option to trade the lock timeout
Here, you could pick out from “Immediately,” “After 10 Seconds,” “After 1 Minute,” and “After 10 Minutes.” Choose certainly one of the options and then faucet at the Back arrow.
- Choose a delay period
- If you don’t believe Face ID or Touch ID to protect your files stored in Drive, you can require your cellphone or tablet’s lock display passcode to enter the app.
- Back in the “Privacy Screen” settings menu, tap at the blue “Open System Settings” hyperlink.
- Tap the “Open System Settings” hyperlink to regulate Face ID or Touch ID settings
Advertisement
- You will be taken to Drive’s section of your iPhone’s or iPad’s Settings menu. Here, you may toggle off permission to use Face ID or Touch ID.
- Adjust permissions for Face ID or Touch ID to show off get entry to
- With the security putting disabled, the subsequent time you open the Google Drive app, it’ll require you to go into your device’s lock display passcode.